tomatoes and fried mint (vegan)

IMG_6507

Prevailing modern wisdom suggests the best way to cook is by taking the highest-quality seasonal ingredients and doing as little as possible to them. Which is fine, admirable, whatever, but I would go one further and propose that the best thing to do with these seasonal ingredients is to fry them. How better to show your respect to anything than by dousing it in hot fat? Especially if, like the Spanish inquisition, the frying is unexpected! We’ve all heated up a tomato. Have you ever tasted fried mint?

IMG_6480

We’re blessed with several containers of glowing-ripe tomatoes from the garden, which magically refill as soon as they’re emptied, and I kept thinking about these tomatoes with fried mint, about how the leaves would go crisp and crunchy and the oil they’d sizzled in would become infused with their heady scent. It’s very possible, highly likely in fact, that I read about fried mint somewhere and internalised the idea – but it appeared in my head out of nowhere, compellingly, and I had a feeling it would be spectacular. That feeling was confirmed. I hesitated before including this recipe on here – I say recipe, it’s more of a vaguely-realised suggestion, a bullet point in the notes app of your phone at best, but it tasted incredible and it’s been forever since I’ve posted savoury, and as the late, sorely missed Anthony Bourdain said in Kitchen Confidential, “Good food is very often, even most often, simple food.” (For some reason I always misremember that book as being called Secrets and Knives, in fact, I was convinced one of his publications had that title; if there’s a doctor in the house I’d love to know if “constantly getting kneecapped by the Mandela effect” is something I can get a pill for.)

IMG_6485

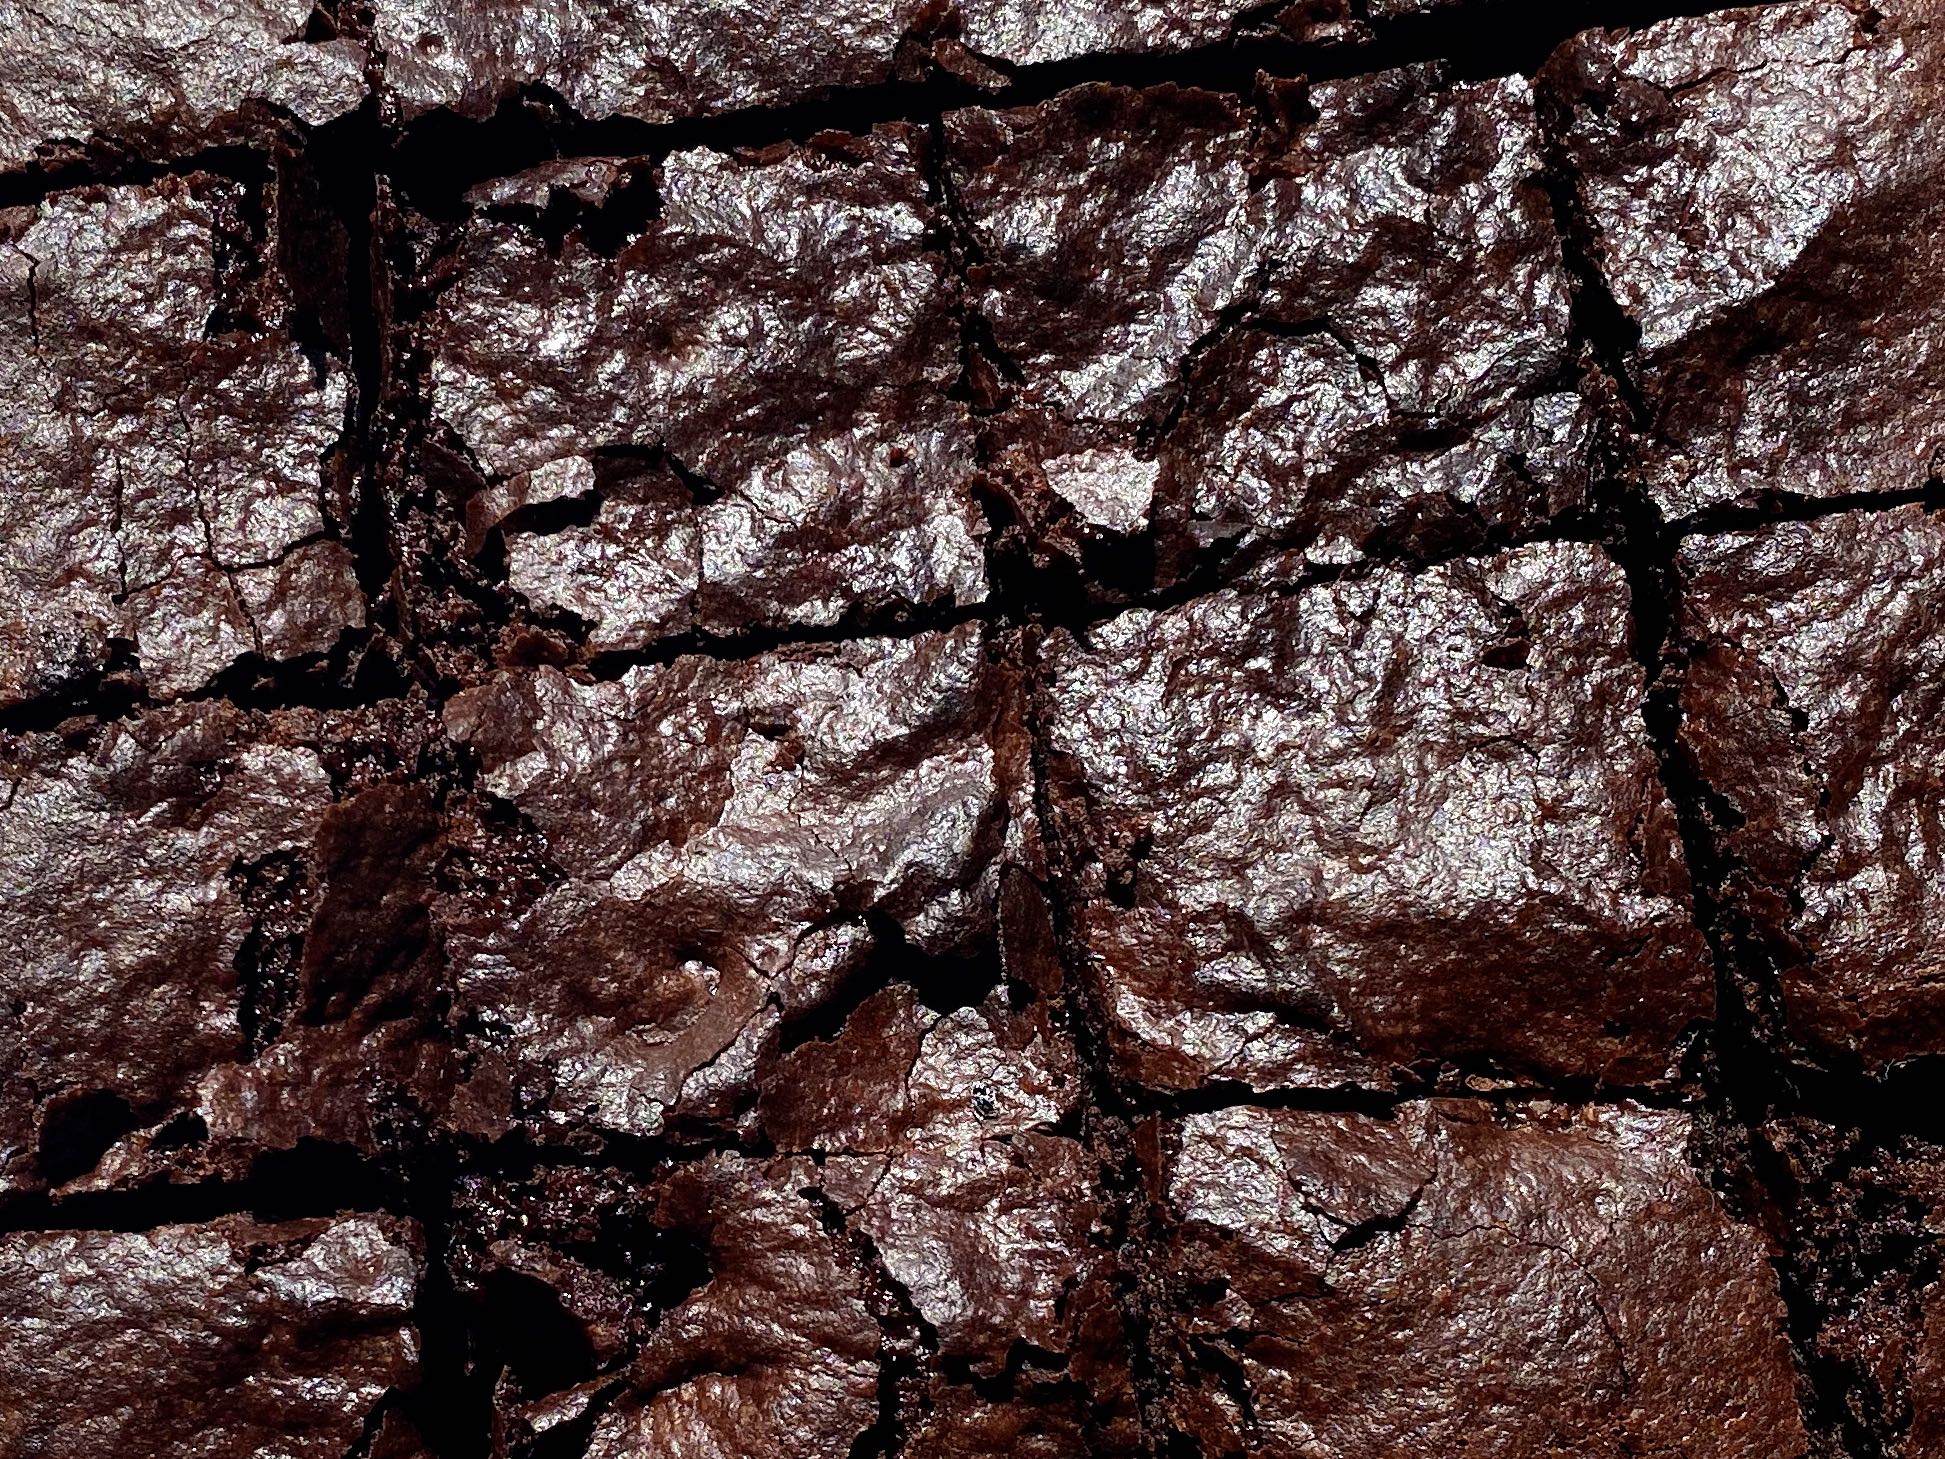
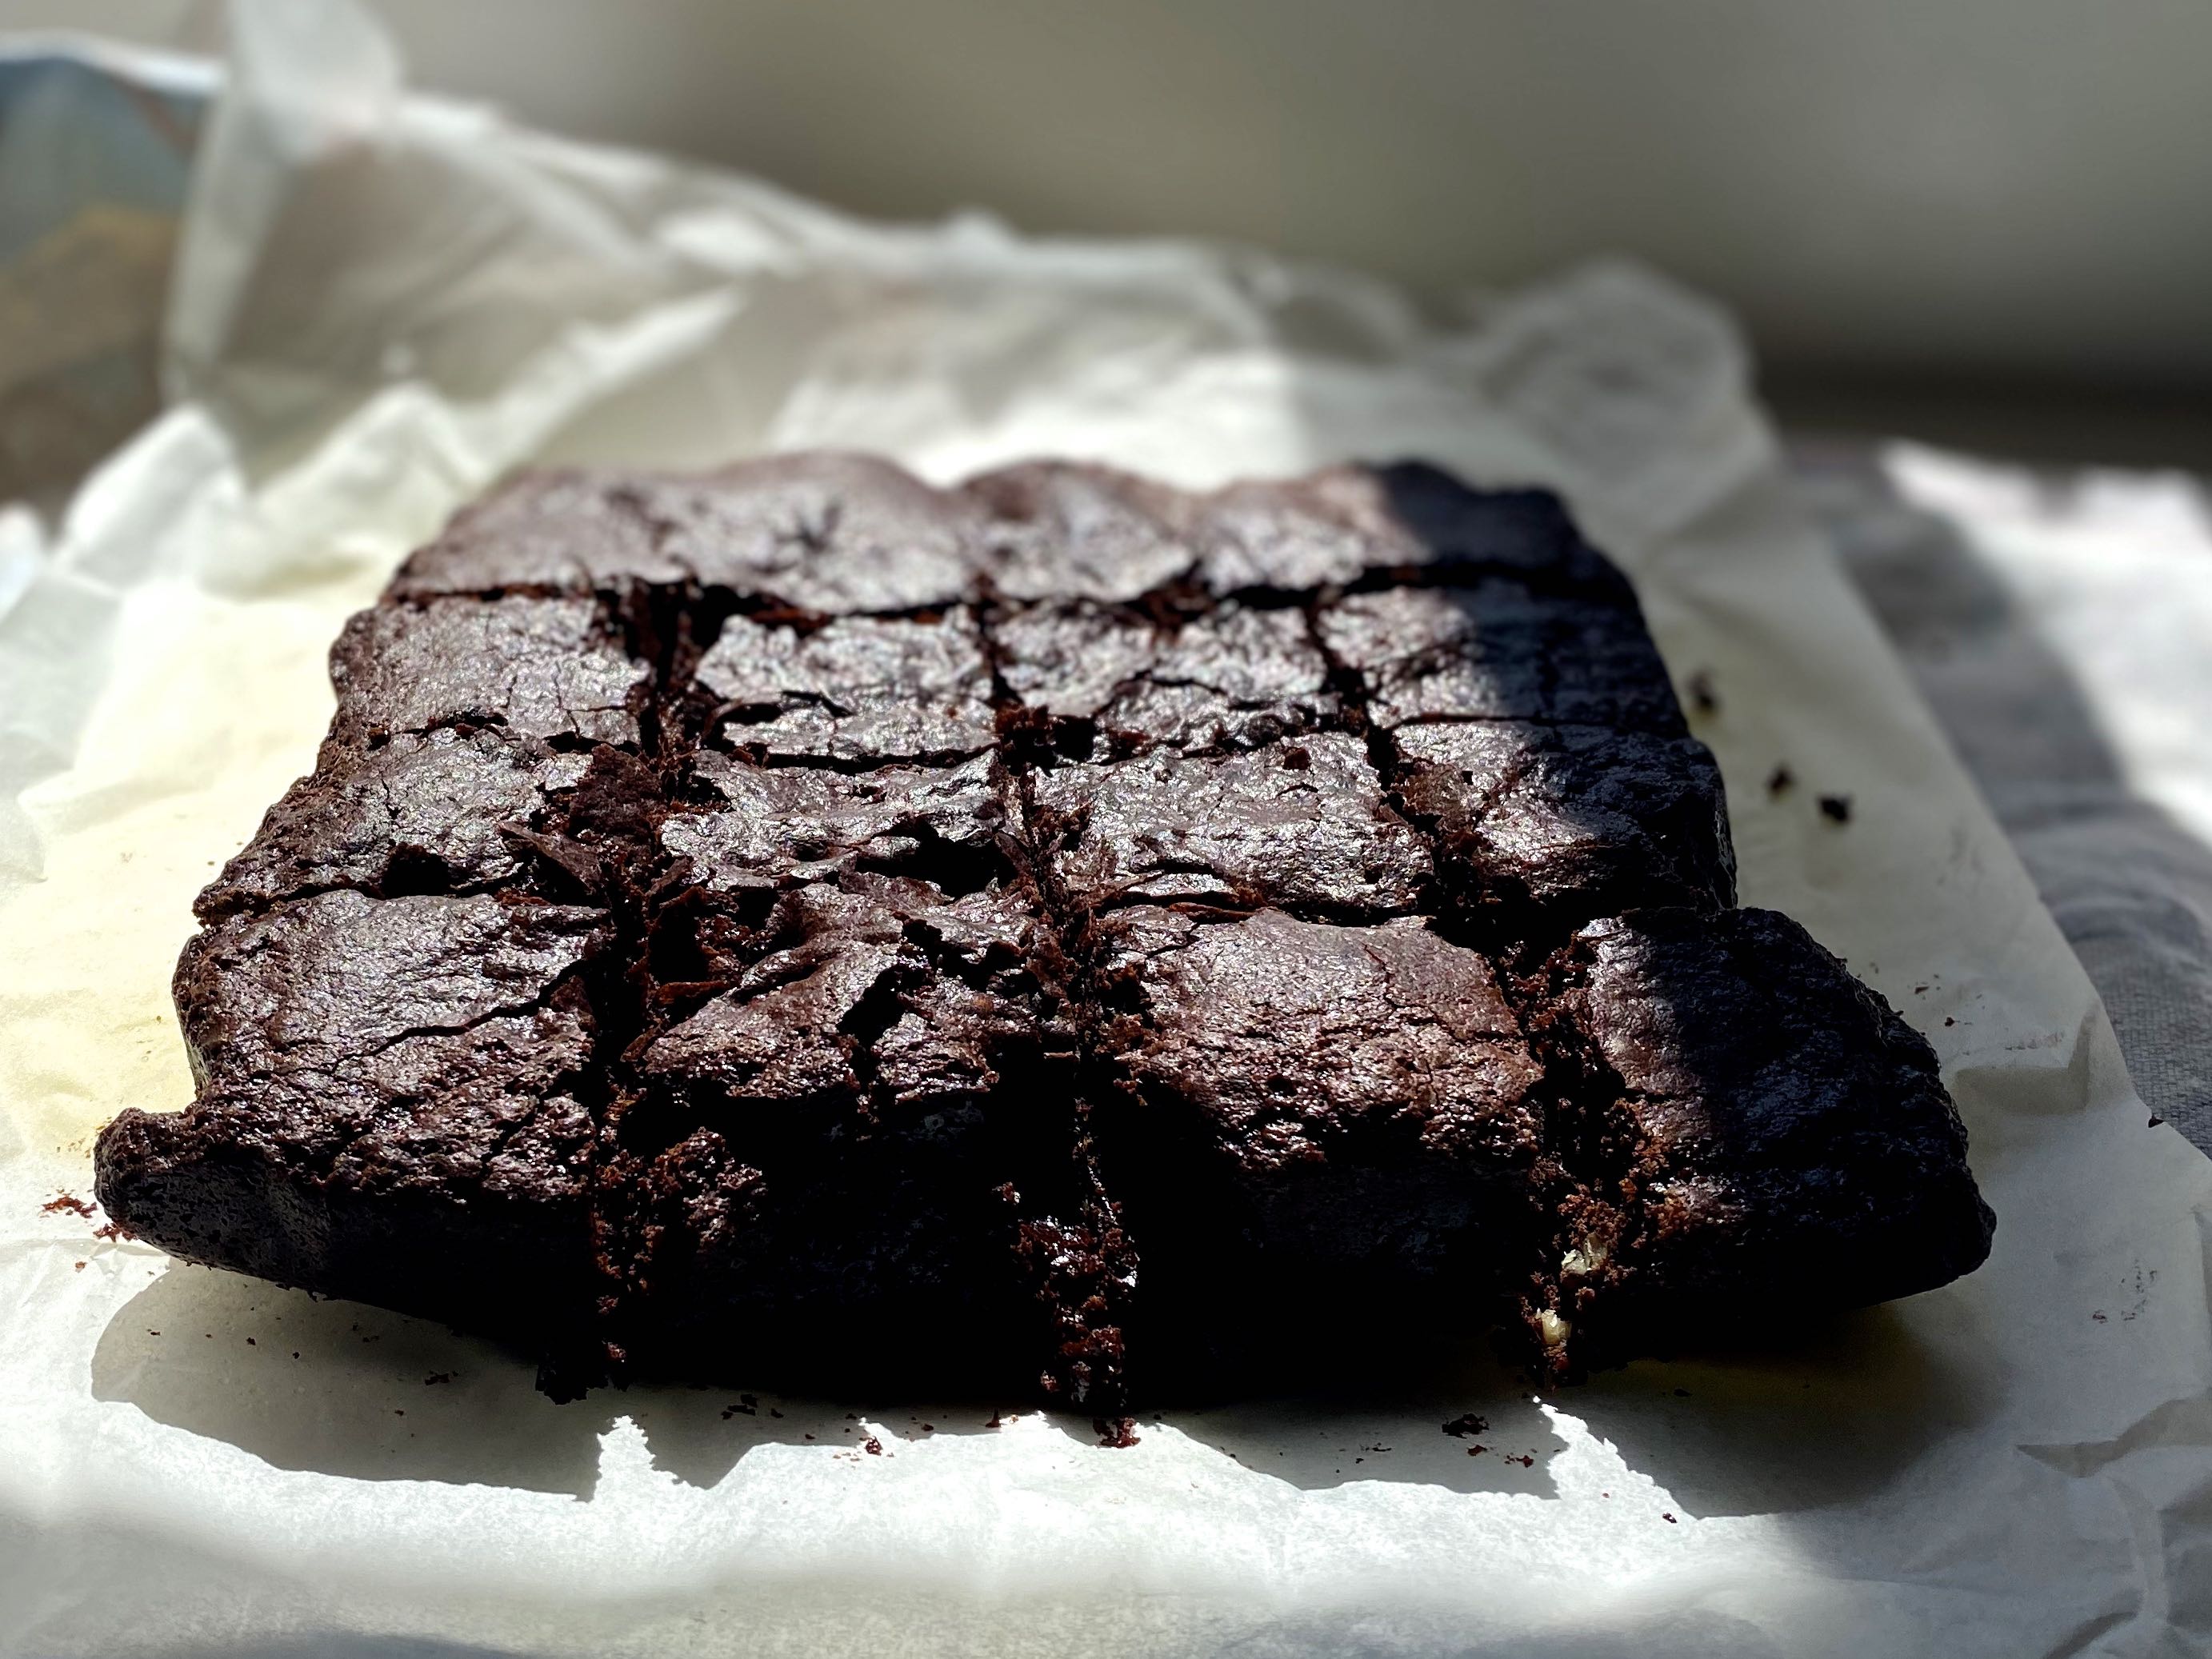
With a recipe so simple as to be almost nonexistent you need good tomatoes, sweet and pendulous, the kind to make your eyes fly open as you bite into them, perhaps followed by an exclamation of “hell’s bells!” I wouldn’t really recommend making this in the shrivelled dead of winter, but right now is that hemispheric sweet spot where we in New Zealand have the last glorious crops of tomatoes coming through while countries up north are starting to post “hot girl summer” captions thus implying tomatoes are moving back into season.

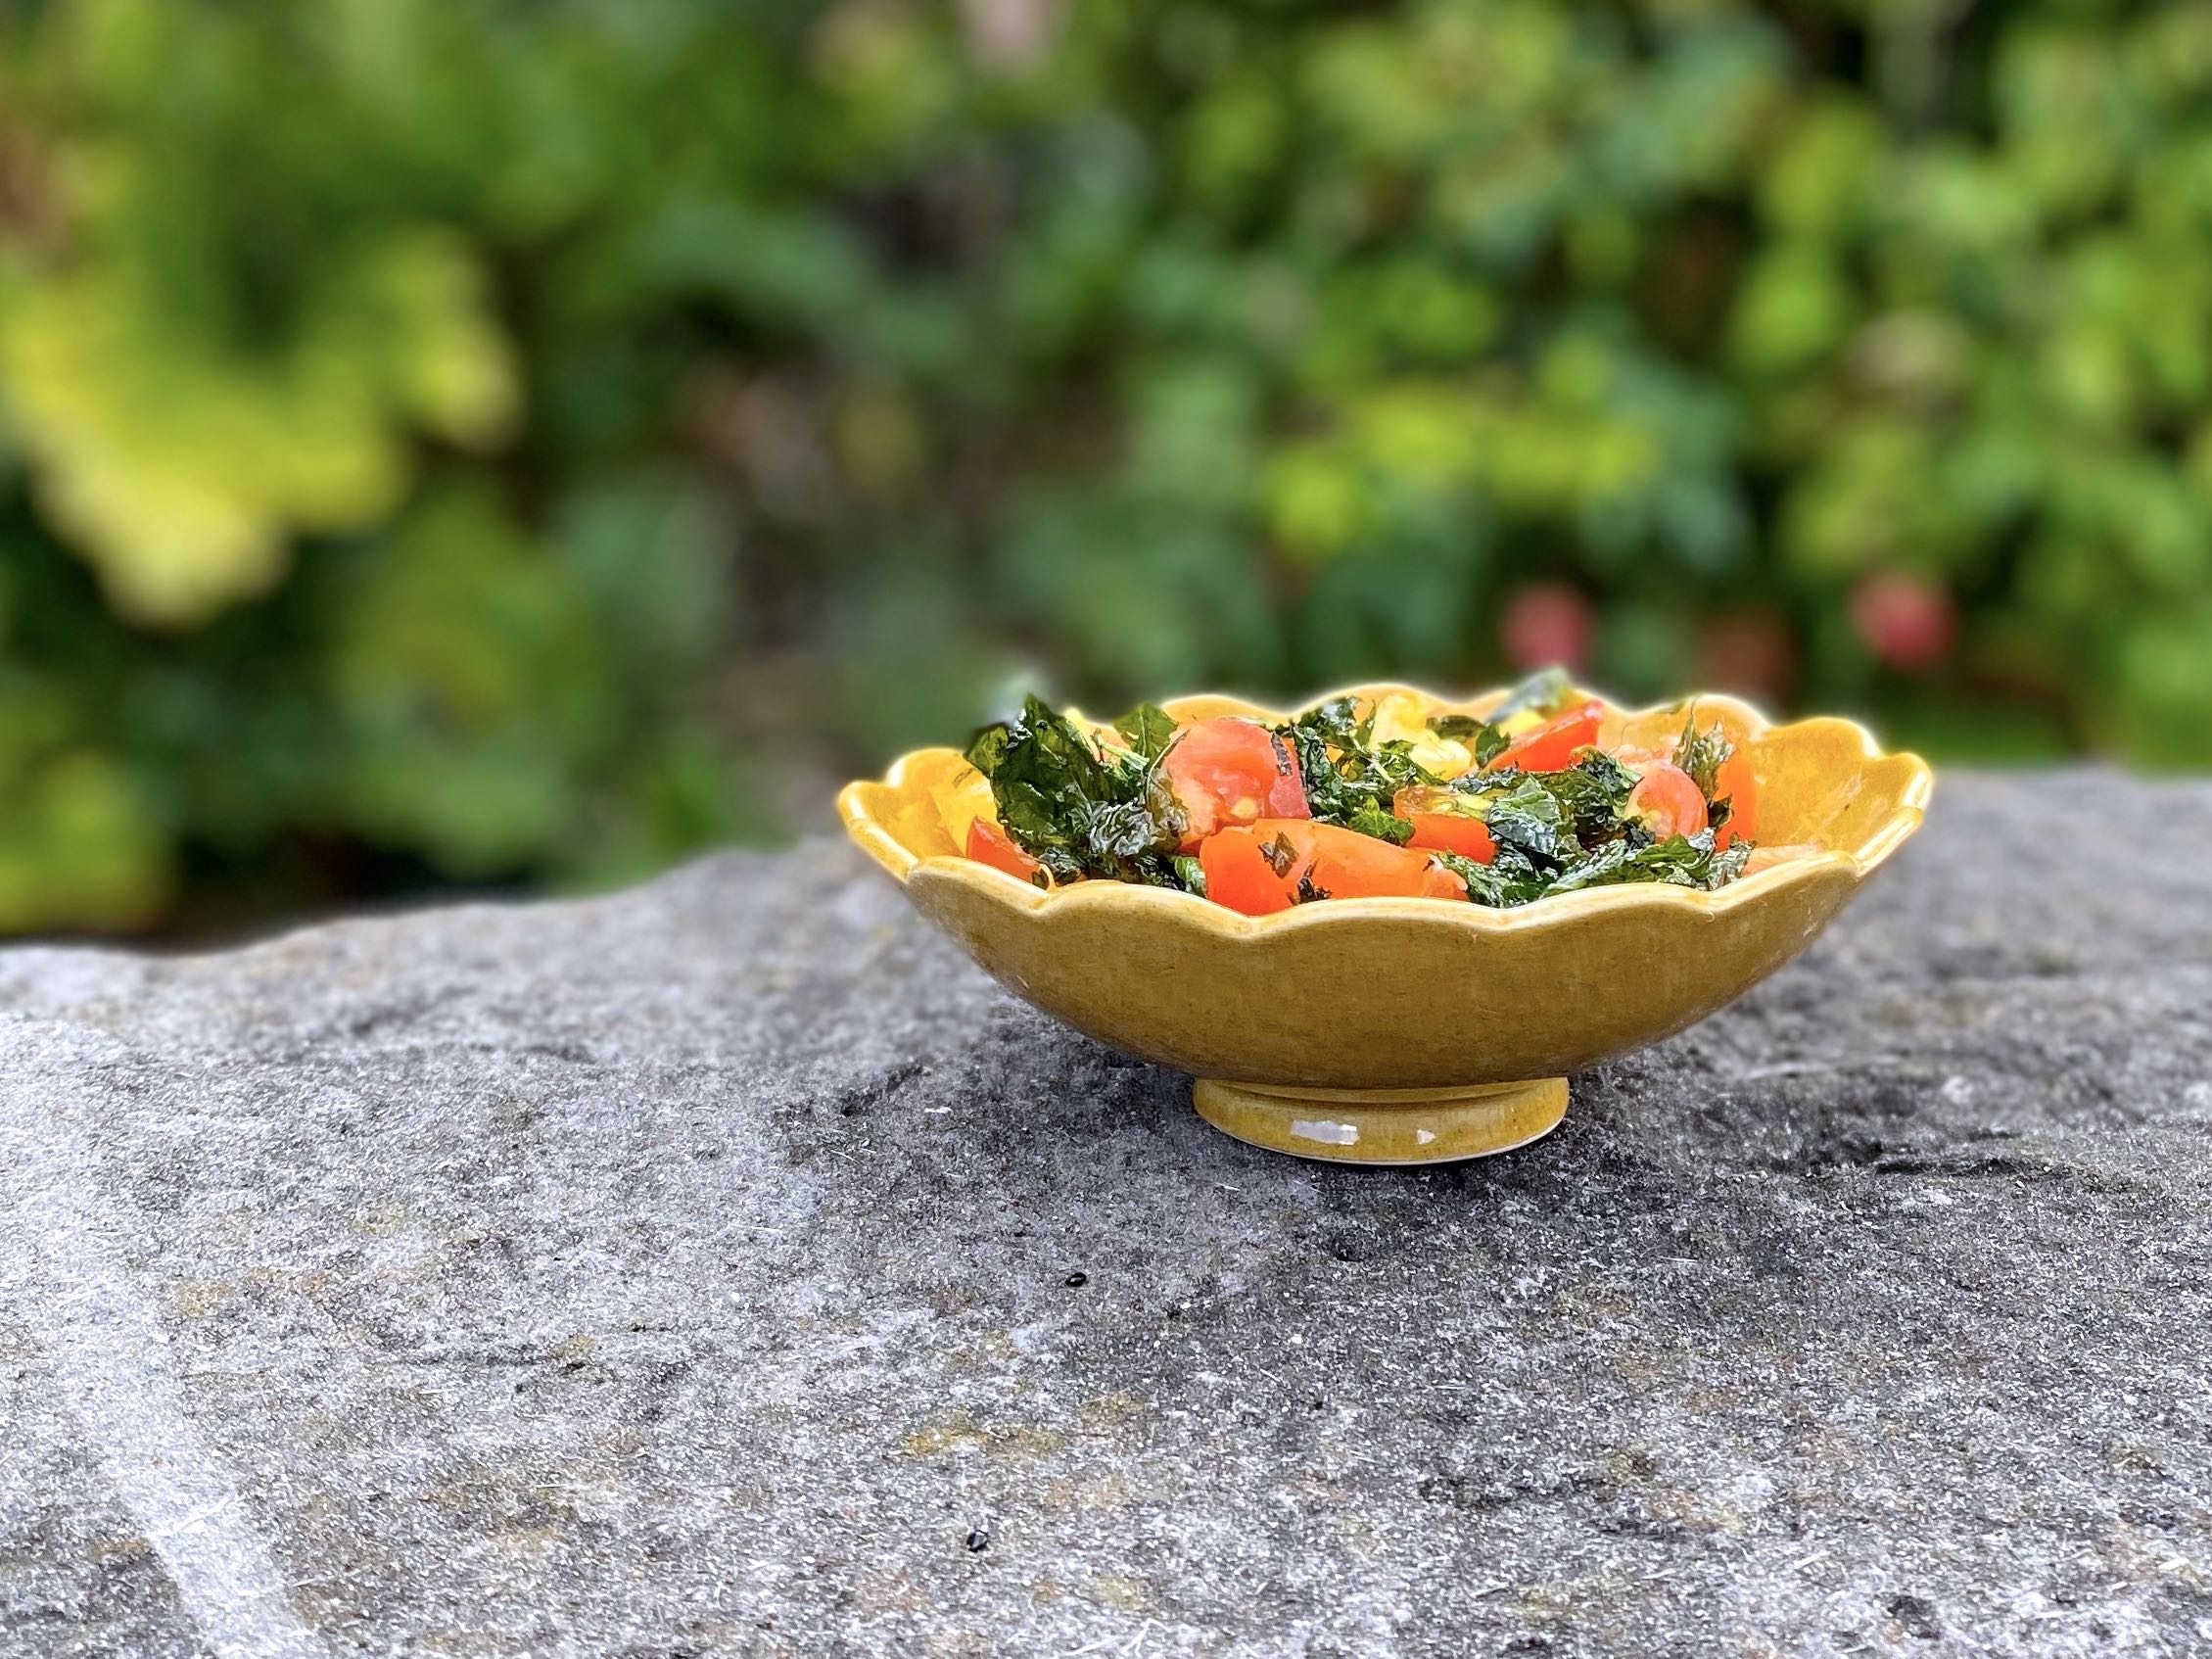
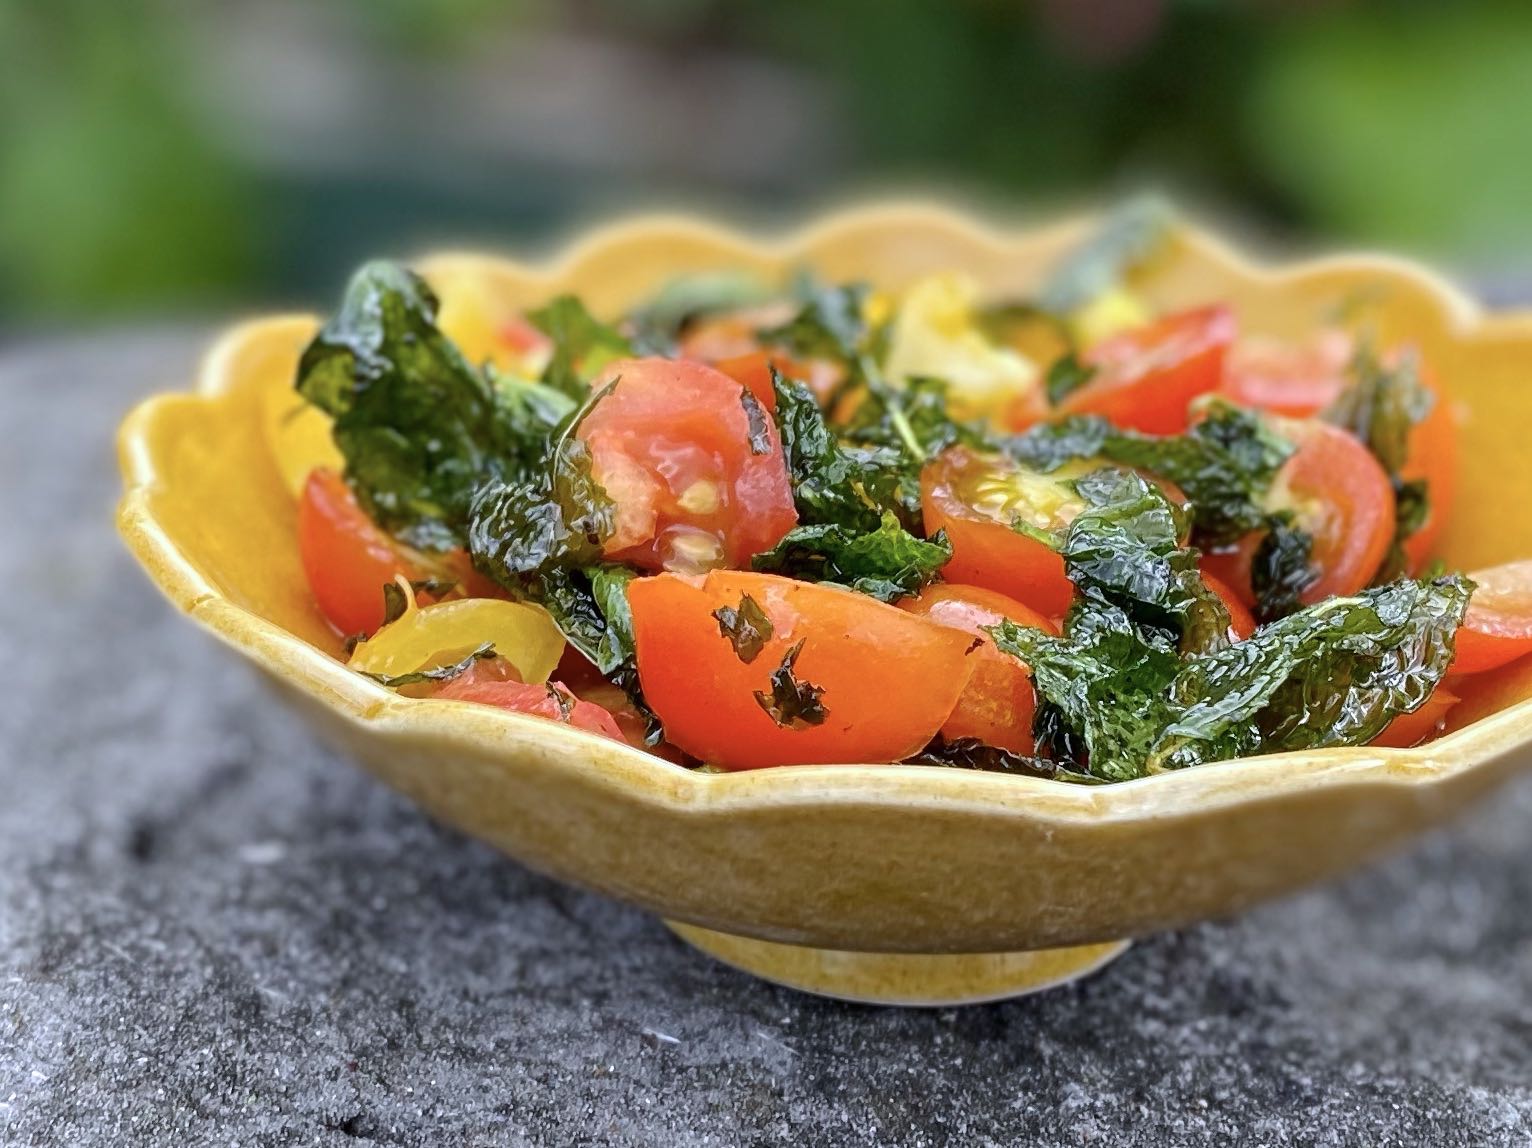
But what about the fried mint? You’d think, freshly chopped and stirred into tomatoes, it couldn’t be improved upon, but this is exquisite – the leaves grow translucent and as shatteringly crisp as filo pastry, their cool heat deepened and made more savoury, more lush. The leaves and their seasoned oil coat the tomatoes with a glossy slick of darkly fresh flavour – it’s sensational, it’s captivating.

Also – and I’m truly not going to do this every time – I made a little tiktok video to go with this. 

@hungryandfrozen

recipe for ya: tomatoes + fried mint 🍅 super simple and lush 🍃go to hungryandfrozen.com for more 🤠 #vegan #recipe #recipes #foodblog #summer #fyp

♬ Cheree – Suicide

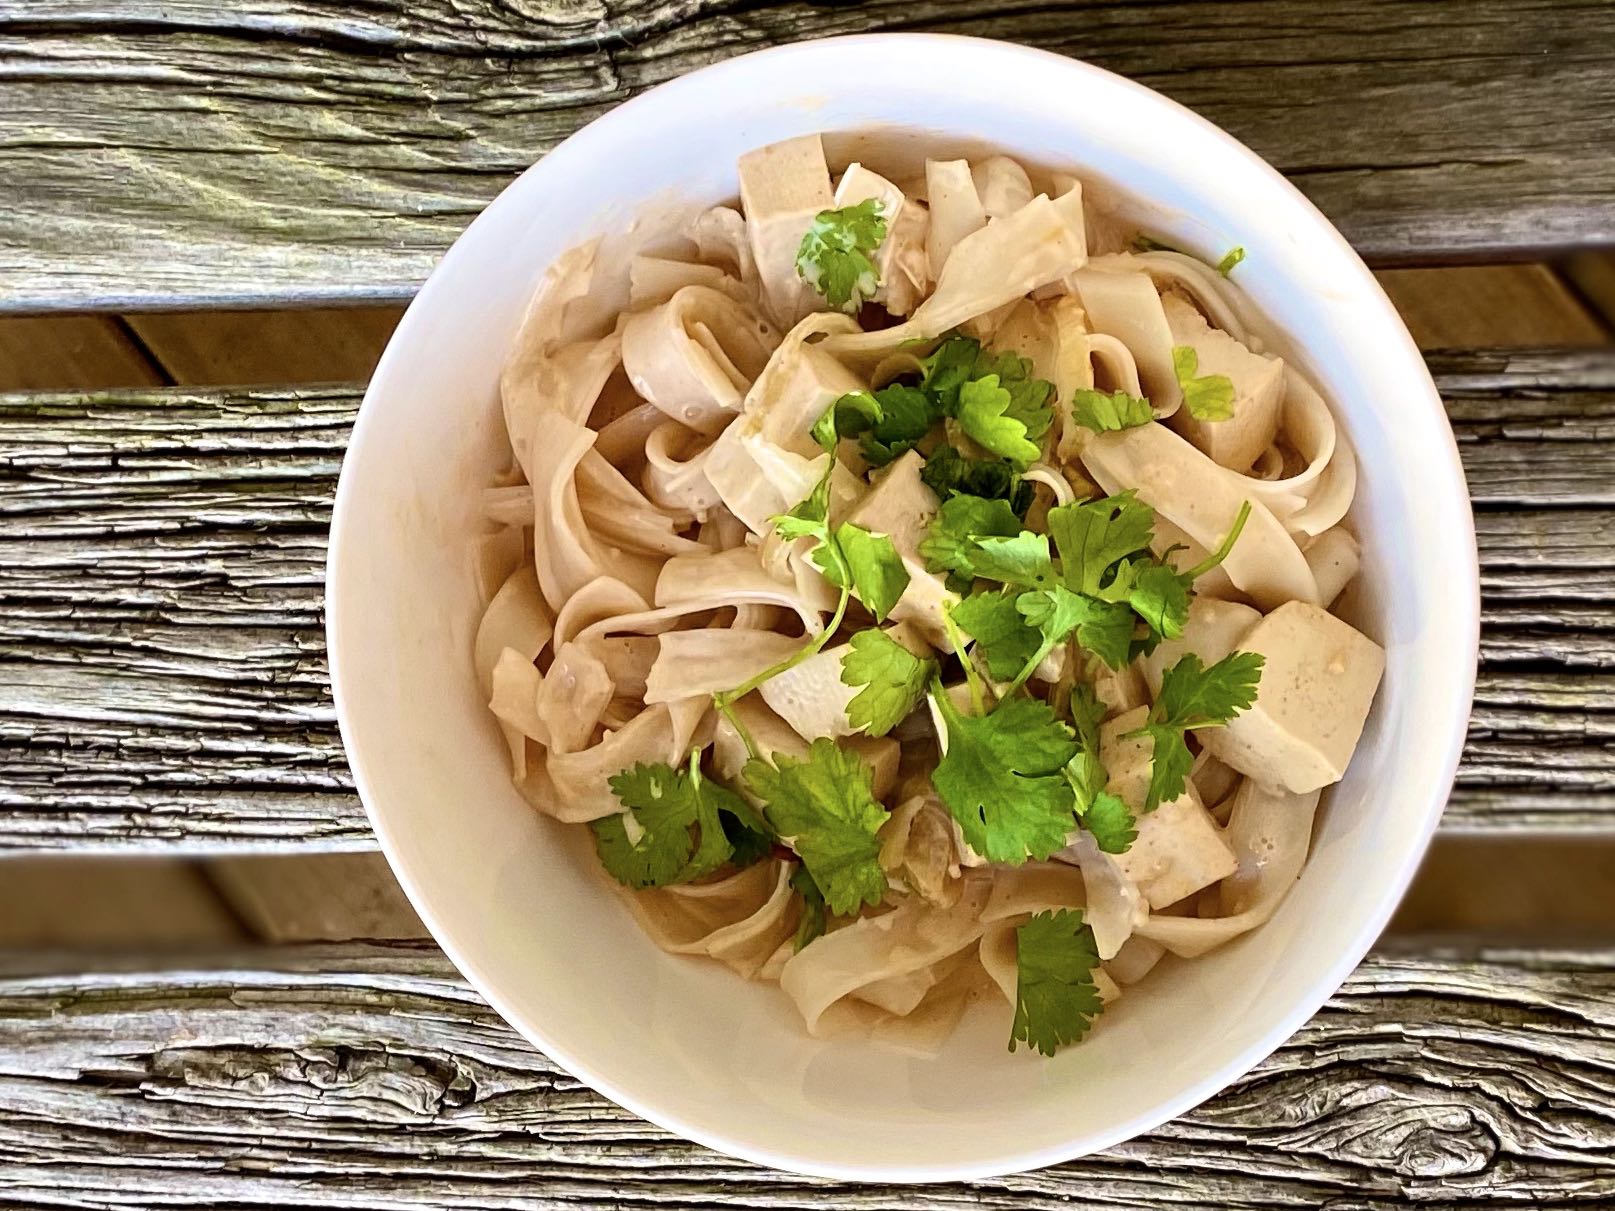
This recipe, as I said, is really, really simple, and I just ate it alongside a short length of baguette – but as with anything tomato-based, it’s amenable to variety. Stir it through hot pasta for an instant sauce, pile it onto couscous and scatter with toasted seeds, add leaves and turn it into a salad, the usual ideas. You could also apply the fried mint and its oil elsewhere – for some reason I’m thinking ice cream, but obviously couscous and so on would benefit – but as it is, the red-and-green symphony (my final hyperbolic adjective I promise) of this recipe is perfect unadorned, eaten standing up in the kitchen because it’s so delicious you’ve forgotten to sit down.

IMG_6521

Tomatoes and Fried Mint

There’s hardly anything to this little salad – but it’s incredibly delicious – so here it is. Recipe by myself.

  • 1-2 handfuls ripe cherry tomatoes, depending on how much you want
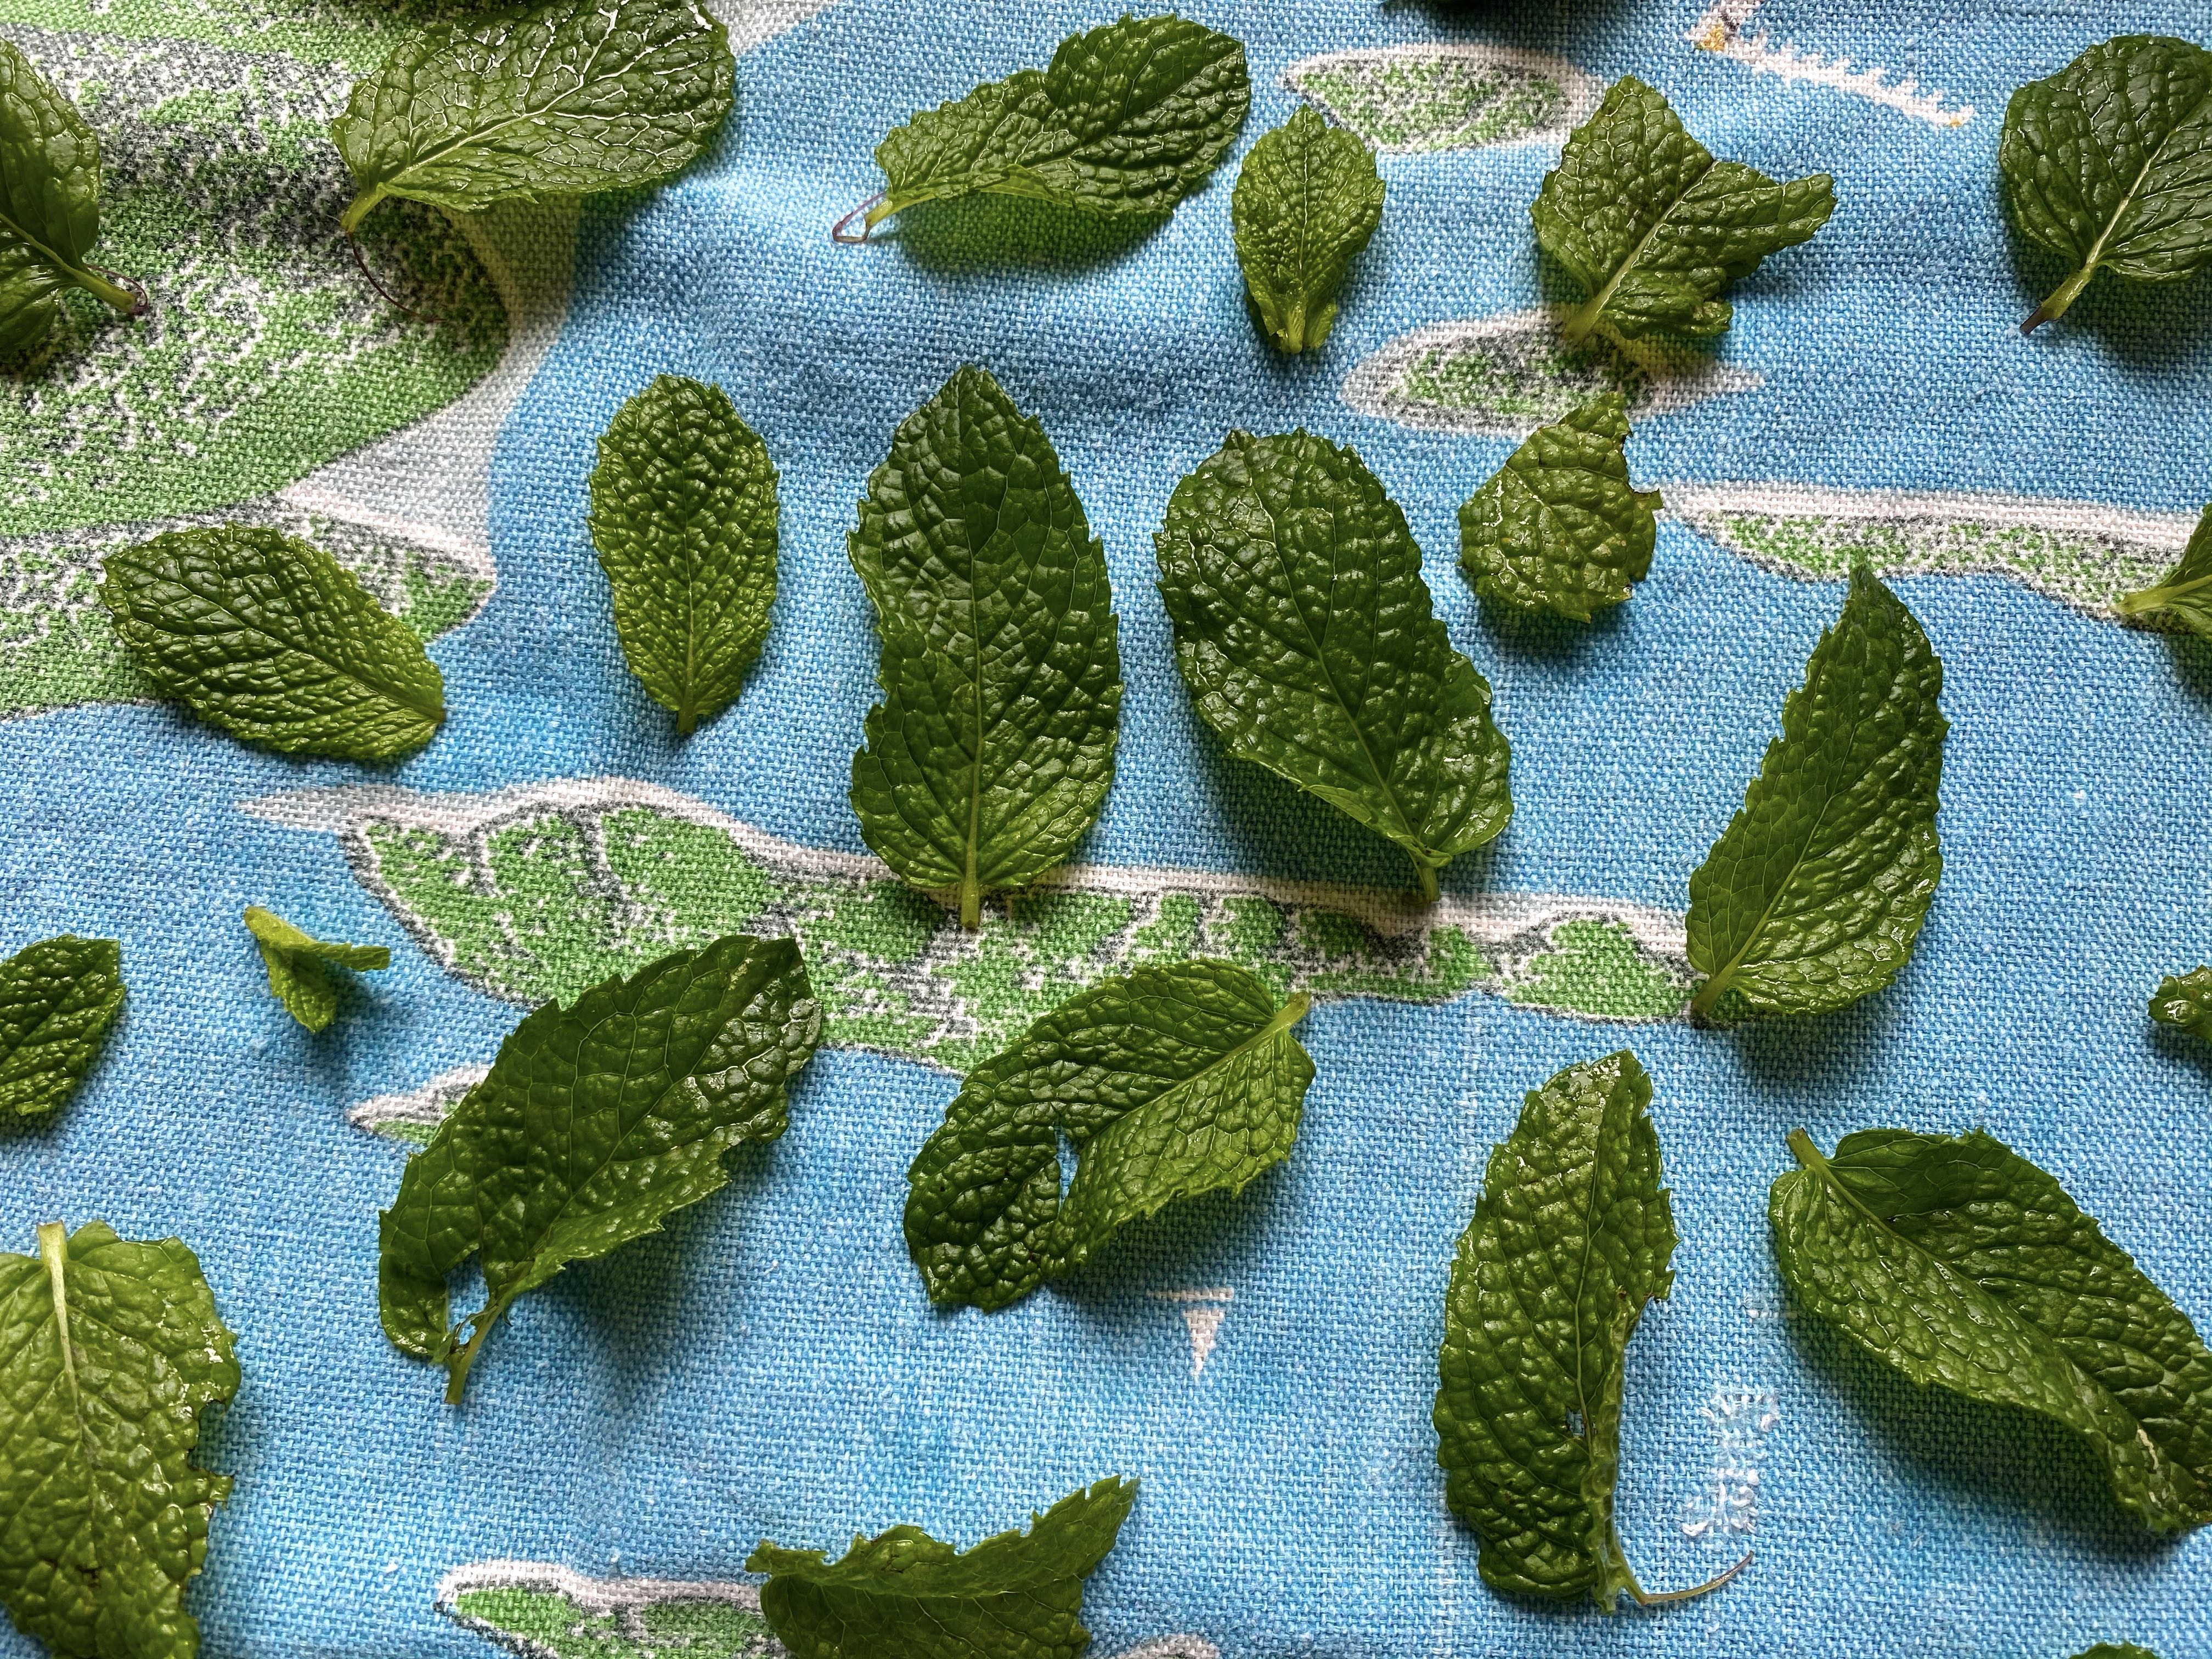
  • 1 handful fresh mint leaves (roughly 15 leaves?)
  • 2 tablespoons rice bran oil or something similarly neutral like grapeseed or sunflower
  • 1 teaspoon extra virgin olive oil
  • salt to taste
  • 1/4 teaspoon malt vinegar, optional

1: Halve your tomatoes and place them in a bowl. If they need it, wash the mint leaves and pat them dry with a clean tea towel.

2: Heat the rice bran oil in a large saucepan and once it’s hot, throw in the mint leaves and cook them for a bare minute or so, stirring a little to coat them in the sizzling oil. Try to keep the leaves more or less in a single layer. I lifted a mint leaf from the pan and crumbled it in my fingers, its brittle, crisp texture was how I knew they were done. I don’t expect you to have the same cavalier attitude towards naked heat, but basically, these should be ready somewhere between thirty seconds and a minute in. Turn off the heat.

3: Spoon the mint leaves and their oil over the tomatoes. Add the extra olive oil and salt to taste. Stir. I also like to add a little ground white pepper, I can’t help it, I love the stuff. If you want to add the vinegar, here’s a good time – I like it both with and without, which I appreciate is not helpful for your decision-making.

Serves 1, possibly more, depending on how you’re using it. Don’t forget to drink the minty tomato juice which pools at the base of the bowl.

Notes:

  • If you don’t have access to a mint plant – and why should you – get one of those mini potted ones from the fresh herb section of the supermarket – the sort which are always overpriced and die almost instantly – and rip off every single leaf.
  • In case you’re wondering why there’s two oils, rice bran oil is better for frying, the dash of extra virgin olive oil at the end is for flavour, and not suited to high heat. I free-pour both and encourage you to do the same.

IMG_6509

music lately:

Blank Generation, by Richard Hell and the Voidoids. Is this the best song in the world? No, that’s Roadrunner by Modern Lovers. But also: yes it is. My methodology is watertight.

Bad Religion, Frank Ocean. This song is nearly ten years old (?!!) and yet it’s still too powerful! Like, imagine listening to this while walking down the street to buy toothpaste. There’s those opening church organs and those devastating, late-in-the-piece drums and that sudden falsetto howl, and suddenly you’re sobbing into a courier van, dental hygiene forgotten. Absolute folly.

A Boy Like That/I Have A Love by Chita Rivera and Carol Lawrence from the Original Broadway Cast recording of West Side Story. I’m always listening to Sondheim but since it was his birthday the other day I decided to listen to everything he’s done in chronological order, and twelve hours later I’d made it to…1957. Anyway – the film version of West Side Story is unsurprisingly what everyone thinks of first, but the original is also glorious – I love Chita’s throaty, knowing voice against Carol’s clear soprano, and those harmonies at the end are just stunning.

PS: If you enjoy my writing and wish to support me directly, there’s no better way than behind the claret velvet VIP curtain of my Patreon. Recipes, reviews, poetry, updates, secrets, stories, all yours on a monthly basis.

Vegan Brown Butter Chocolate Brownies

IMG_6271

Look, everyone’s gonna tell you their vegan chocolate brownie recipe is the best, the one, and you know what? That’s valid. The best need not be a zero-sum game, culinarily speaking, otherwise what’s the point of trying anything new. No, instead it’s a wide couch where we can all sit side by side, happily eating our brownies. So: these are the best vegan chocolate brownies. The one. One of many, that is. But what a one!

Brownies should be the easiest thing to bake – they’re usually one-bowl affairs, you don’t have to worry about them rising or being light-textured like a cake, there’s no faffing about shaping dough, like with cookies, and the presence of chocolate means they’re an instant crowd-pleaser. And yet, we’ve always had a wary relationship – I tend to overcook them into cakey dullness, or overshoot a scientifically crucial ingredient, sending the delicate chemical balance from “fudgy and rich” to “not unlike a peat bog”.

IMG_6268

As it happens, I didn’t get this recipe quite right on the first go. They were somehow too moist and too dry, with a stressful, peanut-butter-esque throat-clogging quality. Sometimes my rejection-sensitive receptors can’t handle this kind of defeat and it’ll send me spiralling with guilt and self-doubt (related: my piece for Tenderly about the heartbreak of recipe failure during lockdown.) I also don’t have all the resources in the world to rigorously test recipes. But we had precisely 100g chocolate left in the house and the first batch was still pleasant enough to eat, so not a total reproachful waste. I cheered myself with the reminder that 99% of the recipes I make up work perfectly the first time, which is pretty extraordinary, slept on it, and woke up knowing exactly how to fix the brownies by adjusting the liquid/flour ratio. It would’ve been nice if these instincts had kicked in a little sooner, but I appreciate them showing up nonetheless.

Second time around: the brownies were perfect. Exactly what you want: a shiny, delicately crisp exterior, a fudgy interior that’s melting without being undercooked, and a staunch chocolate flavour. (Thank goodness.) 

IMG_6288

These brownies are particularly special because of the brown butter step – which is to say, I’m emulating the culinary technique of burning butter to develop its flavour by using an unlikely but potent combination of ingredients. Coconut oil for buttery fatness; soy milk for its proteins; and a tiny dash of vinegar and brown sugar to speed things along, cooked down into a foamy emulsion, at which point I added pecans to assist with the nutty flavour you get from traditional browned butter. I realise this may seem unlikely, but bear with me. The result is this caramelised, toasty liquid with a deep, rich, and genuinely buttery intensity. I love eating vegan food but you have to dance a little harder to give your baked goods the same easily-achieved tastes and textures of non-vegan baking. This vegan browned butter offers complexity and sumptuousness, taking the brownies from two dimensional sweetness to three dimensional deliciousness. I imagine the browned butter would be wonderful used elsewhere, including in savoury recipes, but for now it’s the perfect base for the perfect brownies.

Brownies worth persisting through failure for – brownies so good they require a glamour photo shoot.

IMG_6279

Vegan Brown Butter Chocolate Brownies

These vegan chocolate brownies are fudgy and rich with a crisp edge and absolutely delicious. The “brown butter” step is a little extra work but so worth it. Recipe by myself.

  • 1/4 cup refined coconut oil
  • 1/2 cup soy milk
  • 1/2 cup + 1 tablespoon extra brown sugar
  • 1/8 teaspoon apple cider vinegar
  • a pinch of salt
  • 1/2 cup roughly chopped pecans
  • 1 cup of sugar
  • 100g melted dark chocolate
  • 1 tablespoon instant coffee powder
  • 150ml boiling water
  • 1/2 cup good cocoa powder
  • 125g flour (this is roughly one cup but try to weigh it if you can)
  • 1 teaspoon baking powder
  • 1 teaspoon vanilla extract
  • 100g extra dark chocolate, roughly chopped (optional)

1: First, make the browned butter. Place the coconut oil, soy milk, one tablespoon of brown sugar (save the 1/2 cup for later), the apple cider vinegar, and a pinch of salt into a small frying pan and melt together over a medium heat, stirring constantly. It’ll look dodgy, but trust me.

2: Once it starts looking frothy and bubbly, stir in your pecans and continue cooking and stirring till it’s thickened and pale caramel in colour. Remove from the heat and leave to sit for five minutes. While you’re waiting, set your oven to 180C/350F and line a square brownie pan with baking paper.

3: Now to make the brownie batter – spatula your pecan/brown butter into a mixing bowl and stir in the remaining half cup of brown sugar and the white sugar. Pause to have a little taste: oh my gosh. So delicious.

4: Melt the chocolate (I put it in a small bowl and nuked it in short bursts in the microwave, otherwise heat it in a metal/heatproof bowl resting on a pan of water without touching the water) and stir it into the butter-sugar mix. Stir the coffee powder into the boiling water and set aside. Also – 150ml is more or less 2/3 of a cup, or you can measure 150 grams of water on your scales.

5: Sieve the cocoa powder, flour, and baking powder into the bowl, and add half the coffee liquid. Fold it all together and then add the remaining coffee, the vanilla extract, and the extra chopped chocolate (if using) and fold together.

6: Spatula this mixture into your prepared tin and bake for 30 minutes. At this point, turn off the oven and let the brownies sit there for ten minutes (if your oven tends to really hold its heat, open the door, otherwise leave it closed) and then take the brownies from the oven and let them get basically completely cool before you attempt to slice them. And for that, I recommend a sharp serrated knife and a confident but slow hand.

Notes:

  • Don’t leave out the coffee powder! You don’t taste the coffee specifically but it’s important to add depth of flavour. However, if you can’t have caffeine it’s absolutely fine to use decaf powder.
  • I haven’t tried this with anything other than soy milk. Oat milk would probably work, but I have serious doubts about almond milk.
  • The pecans are specifically used to add a nutty, toasty flavour to the browned butter. I wouldn’t use any other nut here, but if you don’t want the pecans in your brownies you could scoop them out of the browned butter with a slotted spoon and save them for another use. It’s important to use them in the butter step itself though. Hope that makes sense!
  • When I say “good cocoa powder” I mean something with 20g or more fat per 100grams. Look in the nutritional information on the package, anything less than 20g per 100g is unfortunately not worth your time or money!
  • The second time I made these I didn’t have enough chocolate to chop up and fold through and honestly? They were amazing without it. So if you only have 100g chocolate to hand you can totally still make these.

Also if you want a visual reference I made a little tiktok video to go with these brownies. 

@hungryandfrozen

vegan brown butter chocolate brownies 🤠🍫 recipe at hungryandfrozen.com #recipe #foodblogger #chocolate #vegan #veganrecipes #cooking #fyp #brownies

♬ Do You Love Me Now – The Breeders


IMG_6283


music lately:

I Love How You Love Me by The Paris Sisters. There’s something about that Phil Spector production where it’s so present yet so distant, it’s like that exact feeling in The Wizard Of Oz where Glinda the Good Witch is smiling benevolently but also floating away unhelpfully; while I was listening to this the cat walked across my laptop and in the process changed the playback speed to 0.75 which gave it an instantly surreal, Julee Cruise quality and I think actually sent me into spontaneous sleep paralysis – but in a good way? So proceed with caution, I guess.

Unfinished Sympathy by Massive Attack, a song which makes me want to cry and levitate? Which can only truly be appreciated while lying down in a darkened room or clinging to the wing of a 747 as it takes off? Once more I say proceed with caution!

Black and White by The dB’s. “Well, I guess I just don’t enjoy you anymore” – what a sentiment for the ages.

PS: If you enjoy my writing and wish to support me directly, there’s no better way than behind the claret velvet VIP curtain of my Patreon. Recipes, reviews, poetry, updates, secrets, stories, all yours on a monthly basis.

Vegan Passionfruit Panna Cotta

P1200221

Gelatine is one of those ingredients where if I see it in a recipe – no matter how chill I am with cooking elaborate stuff – a voice in my head immediately goes “Nah, too hard.” (Which is a particular roadblock when you grew up poring over eighties cookbooks like I did, a cheerfully colloidal time where anything from salmon to tomato soup to chocolate mousse was pointless without a stiff wobble of gelatine.) Through much reading of Nigella Lawson’s reassuring cookbooks I more or less got to grips with leaf gelatine, but still regarded it with some wary caution and didn’t necessarily go out of my way to make recipes using it.

And as for agar agar, gelatine’s friendly vegetarian counterpart, well. What if it doesn’t set? What if it sets too much? What if this reflects upon my entire worth as a person and a food writer in that order? Etc? 

P1200222

But! Should you be burdened with similar trepidations as me, let this passionfruit panna cotta recipe put your fears at ease with its easiness. This recipe is just so easy and there’s nothing at all to the agar agar aspect of it – simply stir it in and let the mixture cook a little. I appreciate that it’s a relatively specialist ingredient, but I got a good-sized sachet of the Telephone Brand agar agar from an Asian supermarket for no more than a couple of dollars. And even though panna cotta has a slightly intimidating high-end-dessert vibe, these ones stay in their dinky little glasses, so you don’t have to stress about successfully un-moulding them onto a serving dish. This also means less washing up – will the blessings never cease!

P1200224

You could make this with something other than passionfruit, but its sherbety, twinkling sour-sweetness is my ideal pairing for the amicable backdrop of coconut cream. All that tartness captured and suspended in a light yet rich cream is astonishingly delicious – like a cloud made of citric acid – the perfect marriage of texture and flavour – and you’ll find yourself wishing you’d poured the entirety of the mixture into an imperial pint glass all for yourself instead of doling it out between several winsome and dainty goblets for your family to enjoy. (To that end, if you are wondering how I got these nice photos of our dessert it’s because I divided the mixture between six receptacles for the four of us and saved two to photograph the next day, thus depriving my family of a quarter of a fluid ounce each of panna cotta the night before, all for the sake of the blog. What a world we live in.)

I realise last week’s recipe for Vegan Jelly Tip ice cream also used agar agar and I didn’t make a gigantic fuss about it then, for which there are a few reasons: 1) I was planning to blog about this first but the ice cream was just too exciting, 2) I can only say so many things in one blog post, and 3) if I’m gonna coerce you into buying agar agar I at least want to give you plenty of things to do with it. The ice cream is a bit full-on, I grant you, but there’s truly nothing more delicious or simple than this passionfruit panna cotta recipe. Make this, and you’ll suddenly be looking at your tomato soup like damn, maybe those eighties chefs were onto something. 

P1200226

Vegan Passionfruit Panna Cotta

This easy vegan panna cotta is creamy, tangy, light and delicious and – I just need to reiterate again – so easy. The recipe is adapted slightly from this one at anisasabet.com.au.

  • 10 passionfruit + 2 to serve, extra
  • 1 x 400ml can full-fat coconut cream
  • 1/3 cup sugar
  • 1 teaspoon powdered agar agar
  • 1 teaspoon vanilla extract

1: Halve the ten passionfruit and scoop the pulp into a small saucepan. Add the coconut cream and sugar and stir for a minute over a low heat.

2: Mix the agar agar powder with a little water in a small cup, which will make it easier to incorporate into the hot liquid. Add it to the saucepan and stir it briskly to prevent lumps from forming. You’ll be straining it though so don’t stress too much. Continue stirring this mixture over a low heat for another ten minutes without letting it bubble – this will allow it to both thicken slightly and to extract the flavour from the passionfruit.

3: Remove from the heat, stir in the vanilla, and then strain the mixture through a sieve into a measuring jug – extra dishes, I’m afraid, but it’s easier to pour it into the serving dishes this way. Push down on the passionfruit pulp as you’re sieving it, to get the maximum flavour, and save the pulp for smoothies if you like (or at least, this was my plan, but I ended up just eating it all straight out of the sieve.)

4: Pour the coconut cream mixture into your waiting glasses or cups or dishes, and then chill them in the fridge for four to six hours, or overnight if you want to make this in advance.

5: Serve by cutting the remaining passionfruit and spooning the pulp over the panna cottas.

Makes 4 – 6 depending on the size of your receptacles.

Note: You can use a couple more or fewer passionfruit at the start and to serve depending on how many you have.

P1200218

music lately:

Cold Rock a Party by MC Lyte feat Missy Elliot. Ok sure, my enjoyment of this song is more vicarious in these unprecedented times but this song is so good and MC Lyte and Missy are so great that even those hypothetical thrills are pretty genuinely thrilling. I’m obsessed with the airy bounce of the Diana Ross sample; sampling is truly an art form.

Lowdown-down by Lea Delaria. She has several albums where she sings standards in a jazzy fashion, a genre I find incredibly soothing. This song, a pragmatically sorrowful number from LaChiusa’s 2000 Broadway show The Wild Party (based on the Joseph Moncure March poem, The Wild Party, which coincidentally inspired a completely separate off-Broadway musical that very same year) isn’t exactly a standard, but it should be.

Sunset Boulevard by Pocket Knife Morales. Obviously, the title caught my eye but it’s an enchanting song, with the sort of wistful vibe which makes you want to put on a large cardigan and wrap it close as you walk down the stone footpath to post a letter with hope in your heart, pausing to salute the horse in the paddock next door, the autumn breeze threatening to lift your cowboy hat, and so on and so forth.

Next time: I really feel like making brownies, but there’s also this incredible bread recipe from Nigella’s new book.

PS: If you enjoy my writing and wish to support me directly, there’s no better way than behind the claret velvet VIP curtain of my Patreon. Recipes, reviews, poetry, updates, secrets, stories, all yours on a monthly basis.

Vegan Jelly Tip Ice Cream

IMG_5406

The universe sends its swiftest rebukes whenever I attempt to make food motivated first and foremost by “I think this would look cool”, or worse, “this might get me attention”. Any recipe made with too much pride and avarice ends up either unsalvageably disgusting, or worse, flopping, leaving me sweltering in a bonfire of my own vanities.

I mean when it comes down to it, making zeitgeist-baiting food in the hopes of capturing the fickle and changeable attention of literally anyone is 90% of food blogging. Every single recipe I post here, and I won’t pretend otherwise, is done in the hopes that I’ll get enough attention that I no longer have to worry about getting attention because I’ll just be comfortably established, an expected part of the proceedings.

IMG_5412

Anyway, all of this is to say that I made vegan jelly tip ice cream and the idea first came to me because I thought it would look pretty, and also thought perhaps the brand name recognition would make peoples’ eyes light up. But the universe must have identified something pure at heart motivating this because – well – the recipe turned out incredible. So delicious. And I’m delighted to share it with you. For those of you not from New Zealand, Jelly Tip is a chocolate-dipped vanilla ice cream with a raspberry jelly tip, hence the sensibly un-opaque name. It was one of my favourite ice creams growing up and the idea of a vegan version appealed since I can no longer enjoy the dairy-based original. It was later introduced in tub form – which is what my recipe is emulating – and I have many fond memories of digging out as much raspberry jelly ripple as possible with my spoon, probably to the murderous contemplations of all those who had to eat the remaining, brutally excavated ice cream.

My version has a coconut-aquafaba ice cream base, fresh raspberries set with agar-agar for the jelly, and thin shards of dark chocolate. There’s plenty of raspberry for you to dig for, should you be a brat like me, but in truth, the components all need each other and work best together. Each mouthful is a damn symphony of flavours and textures, from the icy vanilla to the vivid slash of raspberry to the snappish and welcome interruption of chocolate. This ice cream has a certain rakish elegance, with those sharp raspberries and the bitter dark chocolate, but without compromising your culinary nostalgia. And for all of my sum-of-its-parts talk, I really want to try making just a vat of the frozen raspberry jelly part, entirely for my own consumption – it’s that good.

IMG_5416

I won’t lie, this recipe is quite time-consuming and involved, but on the other hand, I like to cook? So cooking isn’t a hardship. I appreciate that time is a dissolving commodity, but there’s pleasure to be found in quietly and persistently dicking about in the kitchen in pursuit of one single outcome (delicious ice cream.) And when so many vegan recipes – mine included – involve sticking seventeen things in a high-speed blender – the opportunity to be hands-on at every step of the process feels almost like a treat. Importantly, while there are numerous steps, none of them asks too much of you.

And it really does look pretty. Is that a crime? Not today, according to the universe.

@hungryandfrozen

vegan jelly tip ice cream ♥️🍫🍦🤠 recipe coming soon to hungryandfrozen.com

♬ Orinoco Flow – Enya

Also: I made a goofy little tiktok about making this ice cream – in case I’ve been a dunce and haven’t embedded it properly you can also watch it here. Attention: the most delicious ice cream of all.

IMG_5404

Vegan Jelly Tip Ice Cream

A rather involved recipe, but each of the steps are fairly straightforward and it’s very worth the effort: creamy vanilla ice cream ribboned with fresh raspberry jelly sorbet and dark chocolate, YES! Plus it’s no-churn – you will never need an ice cream maker with my recipes. Makes about 1 litre. Recipe by myself.

  • 2 and 1/2 cups frozen raspberries
  • 1/4 cup icing sugar
  • 1/4 cup water plus a little extra for the agar-agar
  • 1 teaspoon powdered agar agar (I got mine from an Asian supermarket for about a dollar and it’s fantastically useful as a gelatine substitute)
  • 1 tablespoon lime juice
  • 150g dark chocolate
  • 1/2 – 3/4 cup aquafaba (the brine drained from a can of chickpeas – one can should get you somewhere around this quantity.)
  • 1 teaspoon malt vinegar
  • 1/2 cup sugar
  • 1 tablespoon custard powder
  • 1 cup/250ml full-fat coconut cream – if you put the can in the fridge before you start making everything it’ll be easier to get at the thick coconut cream, separated from the coconut water. If you’re not sure that you’ll have enough, refrigerate two cans just in case.

1: Place the raspberries, icing sugar, and 1/4 cup water in a medium-sized saucepan and bring to the boil, lowering to a simmer and cooking – stirring occasionally – until the berries have collapsed into a bright red syrup.

2: Meanwhile, measure the agar-agar into a small cup and stir in about two tablespoons of water – this will make it easier to stir into the syrup. Remove the raspberries from the heat and whisk in the agar mixture and the lime juice. Pour this mixture through a sieve into a jug or container, stirring and pressing with a spatula to extract as much raspberry juice as possible – this is really the only annoying step! Refrigerate the sieved raspberry mixture while you get on with everything else. You can save the remaining seeds for smoothies or just eat them on the spot, as I did.

3: Melt the dark chocolate in the microwave, or in a bowl resting over a saucepan of simmering water without actually touching the water. I just used the same pan that the raspberries had been cooking in, figuring correctly that it would help in the washing-up process. Once the chocolate is melted, pour it onto a tray or oven dish lined with baking paper, and spread it out with a spatula to make a fairly even, thin layer of chocolate. Transfer this into the freezer to solidify while you get on with the next step.

4: Tip the aquafaba and vinegar into a large mixing bowl and beat with electric beaters until it’s stiff, pale and frothy. It should move slowly when you tilt the bowl sideways, and when you raise the beaters the mixture should reach up and follow them before slowly collapsing. You can use a whisk for this if you don’t have the equipment but it’ll take a while and be pretty strenuous. But it is possible!

5: Slowly – a little bit at a time – add the sugar, while continuing to beat the aquafaba. It should become very thick and quite glossy and bright-white. Keep beating until you can no longer feel any gritty sugar granules when you taste a little of it; briefly beat in the custard powder, and then you can finally turn off the beaters.

6: Remove the can of coconut milk from the fridge, open the lid, and scoop the thick coconut cream into your measuring cup. If there’s more than a cup’s worth of thick coconut cream, just add it in too. Save the remaining coconut water for smoothies or other cooking (or just drink it, which is what I did.) Fold this coconut cream gently into the aquafaba mixture – it’ll deflate a little which is fine, and it might look a bit bubbly, but this is also fine! Spatula this mixture into a freezer-proof container (I used a 2-litre one just to make sure it had room to move) and place it in the freezer for ten to fifteen minutes before adding the chocolate and the raspberry jelly. I don’t know if this makes a significant difference to the mixture’s structural integrity but it’s what I did so it’s what we’re all going to do.

7: Remove the tray of chocolate from the freezer and using your hands, crack and shatter it into small pieces – I also scrunched up the baking paper around it to help with this process. Remove the raspberry jelly from the fridge, and take the ice cream base out of the freezer. If it still looks a bit bubbly just give it a quick whisk. Drop spoonfuls of the raspberry jelly all over the surface of the ice cream – they’ll sink, but don’t worry. Sprinkle over the chocolate and use the back of the spoon to push most of the chocolate below the surface. You can make a couple of ripple movements through the ice cream with your spoon if you like, but be careful to just barely stir it – you want to leave lots of big ripples of raspberry present.

8: Cover the container and refrigerate it for two hours – I always do this, I think it improves the taste and the texture – then freeze for about six hours or until solid. This particular ice cream sets quite hard so it needs a ten minute rest out of the freezer before you bust into it; because of all the chocolate it’s also hard to get a perfect scoop but the important thing is, it tastes incredible.

IMG_5417

music lately:

Too Real To Feel by Loop. My brother got me onto this band literally this evening and after one listen I feel like I’ve adored them for years. They’re droney and shoegazy and twinkly and sound like a tremolo in a washing machine on the wool/delicates cycle, so of course I love them!

Neither/Nor by Moses Sumney. The whole græ album is exceptional but this song is particularly glorious with that introspective, Led-Zepp-slow-track guitar, his effortless slide into an ethereal falsetto, and the intoxicating, driving drumbeat.

As If We Never Said Goodbye from the musical Sunset Boulevard (based on the film, Sunset Boulevard) as sung by Betty Buckley (who you may know as the gym teacher in the film Carrie). I know I use the word “literally” a lot (and I mean it every single time!) but literally every time I watch her sing the “I’ve come home at last” line around eight minutes into this grainy, poor-quality bootleg video, I start to cry and no amount of rewatching it can desensitise me to its awe-inspiring power.

PS: If you enjoy my writing and wish to support me directly, there’s no better way than behind the claret velvet VIP curtain of my Patreon. Recipes, reviews, poetry, updates, secrets, stories, all yours on a monthly basis.

Coconut Chilli Tofu Noodles [Vegan]

IMG_5045

In my last blog post, I talked about how a lot of my dinner recipes don’t end up on here for various photogenically-challenged reasons. Well, here’s one for you – if you will excuse the hasty phone-snapped photos, with the mise-en-scene being me ferrying my bowl of noodles about the house searching for a corner or recess where they might appear inviting. That’s how delicious this recipe is, I just have to share it with you even though the photos aren’t the greatest. (Although, we’ve already dealt with photos worse than this, if more stylistically confident.)

And to be fair, even if the photos were more thought-out, this is still a very pale and unlikely looking dish of warmed through tofu and rice noodles, with that layer of coriander doing some very heavy lifting, visually. I promise you, it’s more seasoned than it looks, and it’s so good. This recipe, a version of which initially ended up in my 2013 cookbook, gives you everything: it’s practically instant, it’s carbonara-level creamy and soft and saucy, and it’s superbly comforting. And while there is definitely chilli present, it’s sedated and dispersed by the coconut cream.

IMG_5034

That being said, there’s nothing stopping you from adding more and more gochujang (Korean chilli paste) to the recipe – this is comfort food with the ability to bite you back, if that’s what you need. And I’m certainly not going to leap out from the third draw down and protest if you want to add less chilli, but I’d at least urge you to start small and see how you go, rather than leave it out altogether, at which point this would become a dish I couldn’t recommend in good conscience. The gochujang adds heat, yes, but in a way that reminds you of life’s bracing potential rather than the metallic clank of your imminent mortality.

IMG_5048

Coconut Chilli Tofu Noodles

These near-instant vegan noodles are so comforting and creamy but also as spicy as you want or need it to be. Recipe by myself. Serves 2.

  • 1 x 200g (or thereabouts) package wide rice noodles
  • 1 large onion
  • 3 garlic cloves (or a hefty dash of garlic powder)
  • 2 tablespoons neutral oil (eg rice bran)
  • 300-400g extra firm tofu
  • 2-3 tablespoons gochujang, plus more to taste
  • 2 tablespoons Maggi seasoning sauce, or soy sauce
  • a squeeze of lime juice (I sometimes use vinegar if I don’t have any lime)
  • 1 x 400ml can full-fat coconut cream
  • large dash of ground white pepper
  • a dash of sesame oil and a handful of fresh coriander, to serve

1: Peel and finely slice the onion and finely chop the garlic. Place the noodles in a heatproof bowl, cover with water from a just-boiled jug, pushing them under the surface of the water with a utensil of some kind, and set aside to soften. Meanwhile, heat the oil in a medium-sized saucepan and fry the onions and garlic in it for a minute or two, until they’re softened and starting to colour.

2: While this is happening, take a moment to dice the tofu into good-sized cubes of about 2cm. Please don’t stop to measure. Stir the gochujang into the onions, then add the tofu and give it another stir. Then add the Maggi sauce, the lime juice, the coconut cream, and the white pepper. Quarter-fill the empty coconut cream can with tap water, swirl it around, and tip it into the pan as well. Bring to a robust simmer, and stir till the tofu is heated through, which should only take a minute or two.

3: Drain the noodles, add them to the pan, stir everything all together, taste to see if it wants more chilli or seasoning, then remove from the heat and carefully divide between two bowls.

Shake over a few droplets of sesame oil and roughly tear the coriander leaves, blanketing each bowl of noodles with them.

Notes:

  • I used to just make this with sriracha or, if I had one to hand, a chopped red chilli. The Korean fermented chilli paste gochujang is now my favourite and recommended method of adding chilli to these noodles. It’s just got so much flavour and depth and intensity. I got mine from an Asian supermarket, I think Countdown stocks it too. It does pack a lot of heat on its own which seems to chill out in this recipe, but if you’re really not sure of your tolerance just start with a small teaspoon of it, then augment after the noodles are added if necessary.
  • You can definitely use coconut milk instead of coconut cream, I just tend to exclusively use coconut cream because you get maximum flavour and texture for your buck. Either way: full fat.
  • I guess you could use something other than wide rice noodles. But I wouldn’t want to! They work so perfectly here.
    If you want to make this more soupy and saucy you can simply add more water, I’d maybe throw in a stock cube as well.
  • I use Maggi sauce in everything and strenuously recommend that you find some if you aren’t all over it already. You won’t be sorry.
  • Finally, if you can find vegan oyster sauce, add a splash along with the Maggi or soy sauce.

IMG_5035

music lately:

Oh, What A Beautiful Mornin’ by Damon Daunno and Mary Testa from the 2019 Broadway revival of Oklahoma! which, without changing a word of the book or score, made this familiar classic into something new altogether, and I wish so much that I’d had a chance to see it live. This version of the opening song gives it this incredibly compelling mournful-yet-sexy bluegrass vibe, and I can’t stop listening to it. I also recommend Ali Stroker’s brash, unapologetic, and Tony Award-winning take on I Cain’t Say No, worth listening to for the way she roars the word “chaps” if nothing else.

Nine Million Rainy Days by The Jesus and Mary Chain. While it’s not my favourite song of theirs, it perfectly represents one of my favourite genres of music, which is “gloomy yet exhilarating”. And that line “and all my time in hell was spent with you” is better than anything I’ll ever write. (My favourite of theirs? The exhilarating-yet-exhilarating Head On, of course.)

Ode to the Wind, by 1960s Texas garage band Danny and the Counts. It’s melancholy and gorgeous and it’s a literal crime that their music isn’t more widely available on Spotify!!

PS: If you enjoy my writing and wish to support me directly, there’s no better way than behind the claret velvet VIP curtain of my Patreon. Recipes, reviews, poetry, updates, secrets, stories, all yours on a monthly basis.